
Our charging unit prototypes
What are the charging unit prototypes shown in the design guidance? Find out about the features of our two prototypes, why we have developed them in this way, and see the benefits of each design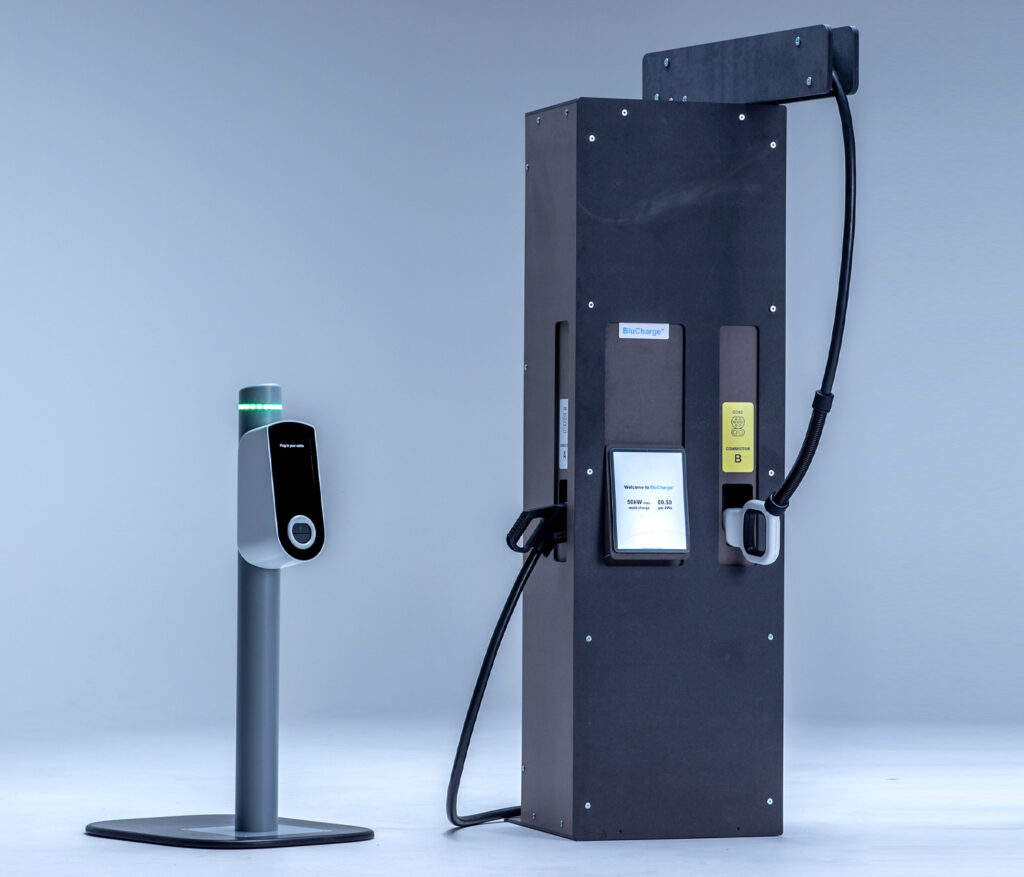
What we designed and why
We designed two types of physical model, or prototype, in response to our engagement with disabled drivers and passengers and those close to them.
The prototypes helped us to demonstrate some of our ideas as we developed a number of designs directly with disabled people (see how we developed the design guidance), and give examples of how public Electric Vehicle (EV) charging could be more accessible.
These prototypes will not be developed further by Designability, but are intended to act as inspiration for the EV charging industry about how to make charging an EV more accessible.
Fast charging units are commonly found in public spaces. They tend to be small units next to a road or in a car park, and the user typically provides their own cable. Find out about our fast charging unit prototypes below.
Rapid charging units are large units often found in car parks or at service stations and charging hubs. They have a thick, heavy cable which is attached to the charging unit, to supply the power needed to charge a vehicle in less than an hour. Find out about our rapid charging unit prototypes below.
Go to our design guidance pages to see the full range of evidence-based guidance for developing accessible EV charging solutions, including wider topics such as information, signage and the built environment.
Fast charging unit design examples
We demonstrate below accessible features for fast charging units including:
- connector design to support different grips
- socket covers that can be used with one hand
- position of key features on the charging unit e.g. socket height
- space to rest walking aids while plugging in
- simple displays to provide information and feedback during the charging process
Watch this short video to see the fast charging unit prototype key design features, or, read about the design features below.
Connector design

Top mounted handle
This additional handle on top of the connector allows people to use a second hand to plug in or remove the connector from the socket.
This is particularly useful for those with limited strength and dexterity.
The looped handle can also be used to carry the connector on the wrist or forearm if both hands are needed to propel a wheelchair or grip walking aids.

Connection indicator
This coloured indicator communicates to the user when the connector is fully inserted (green), or if the connector is not plugged in (red), and needs to be pushed in further.
This is a common problem, especially with new and stiff sockets.
Providing this feedback on the connector prevents people from leaving the charging unit and having to return when they later find out their vehicle is not connected.
Socket covers
The challenge is to allow people to plug in the connector with just one hand whilst still protecting the socket when not in use.
Each of the following three design examples achieves this in different ways.
-
Hinge in socket cover doors
This design allows the connector to be inserted directly into the socket without opening a socket cover.
Just align the connector and push to plug it in.
Upon removing the connector the hinged socket cover doors spring closed automatically.
-
Push down socket cover and connector rest
Place or rest the connector on the lip of the socket cover, push the cover down and insert the connector.
The socket cover slides back up automatically (spring loaded) once the connector is removed.
The lip of the socket cover helps to align the connector, which is useful for those people who find it difficult to line up the connector with the socket.
-
Slide up socket cover (powered)
Touch the socket cover, or just bring the connector close enough, and the socket cover slides up automatically, exposing the socket ready for connection.
When the connector is unplugged the socket cover slides down automatically after just a few seconds.


Position of key features
Socket height and angle
It is important that both seated and standing users are able to reach the socket on the charging unit to plug in the connector and charge their vehicle.
Although a higher socket is preferable for standing users and lower socket for seated users there is a narrow height range that can accommodate both.
Tilting the socket upwards at a slight angle helps taller people see the socket without compromising use for seated users.
Our work with people with a range of different needs helped inform the specifications for component height in PAS 1899:2022 Electric vehicles – Accessible charging – Specification (opens in a new window).
PAS 1899:2022 provides a specific range of dimensions for socket heights, as well as heights for other features on the charging unit including touch screens and payment pads.


Space to rest walking aids

Walking aid holder
This small addition to the charging unit provides somewhere for people to hang or rest walking sticks and crutches while starting or stopping a charge.
This allows them to use their hand(s) for plugging in the cable and operating the charging unit.
This holder or hook can also be used to hang excess cable rather than it dropping to the ground, which can help people manage the cable if they cannot bend down and pick it up.


Simple displays

Our fast charging unit prototype has a simple display, showing a small number of fixed instructions and feedback on the unit during the charging process.
Instructions are clear and easily visible, displayed one at a time (only when relevant).
Simple lighting also helps to communicate the charging status. Green = available, Blue = charging, Red = out of service.
The images below show the different instructions and feedback visible on the display during the charging process.


Rapid charging unit design examples
We demonstrate below accessible features for rapid charging units including:
- connector design including cable placement and considerations for different grips
- cable management to help support the weight and length of the cable
- position of key features on the charging unit e.g. holder for the connector
- simple touch screen interface to provide clear instructions and feedback during the charging process (including audible feedback and voice option)
- clear labelling of key features on the charging unit e.g. connector type
Watch this short video to see the rapid charging unit prototype key design features, or, read about the design features below.
Connector design

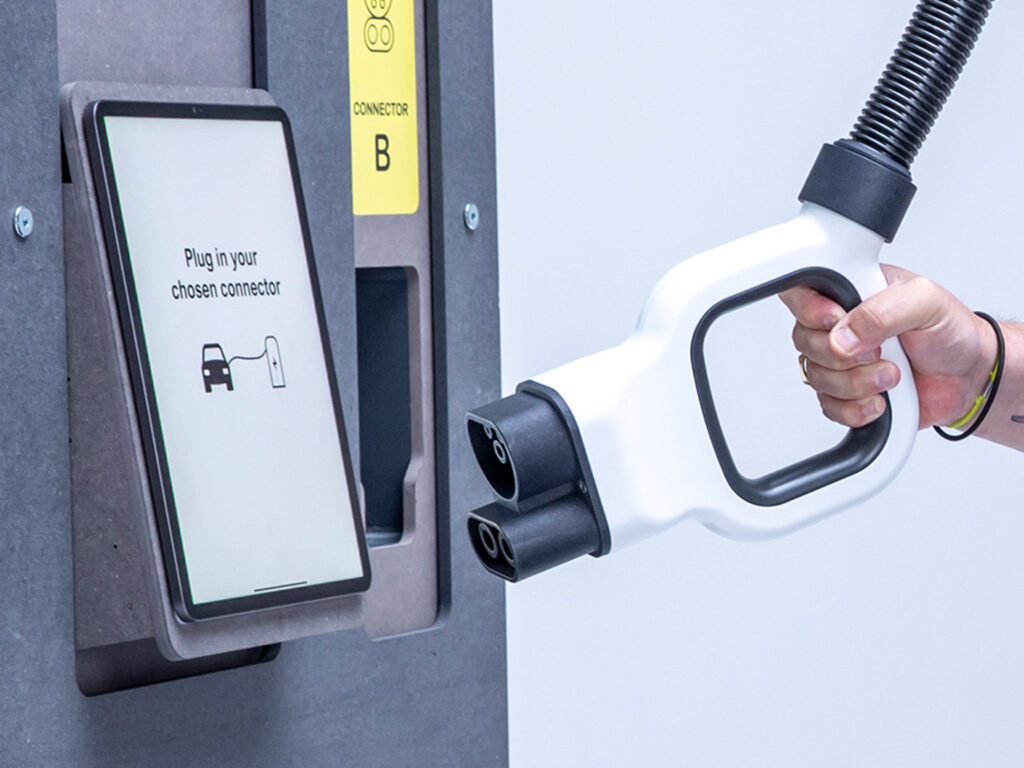
‘Looped’ handle
This design means the connector can be held on the top, bottom and back of the handle, allowing it to be gripped in different ways, with one or two hands.
This supports people with a range of different strength and dexterity in their hands, and people approaching the charge point at different heights.
For example, a seated wheelchair user may grip the back of the connector, whereas a tall standing user may grip the top of the handle.

Top mounted cable
To reduce the impact of the cables weight on the user we designed a connector with the cable mounted on the top of the handle.
This enables the cable to be supported from above by the charging unit and created a ground space free from trailing cables, reducing trip hazards and providing more space for all users.
The following images show the connector design being held and gripped in different ways.

Cable management

Suspended ‘hanging’ cable
The cable is suspended from above on a moving overhead arm. This supports the weight of the heavy cable and allows easy positioning. There is hardly any cable weight to lift when moving the cable close to the charging unit.
These design features also allow people to let go of the connector completely and it will hang above the ground. This is particularly useful if the person needs to move their wheelchair or other mobility aid with more than one hand, or cannot bend down to pick up a connector that has been dropped.
If a longer cable length is needed, the cable can be pulled away from the charging unit and more cable will be exposed.

Flexible cable near the connector
This design seeks to improve the flexibility of the cable close to the connector, to make it easier to bend when plugging into the vehicle socket.
This has significant benefits for all users, but especially those with reduced strength and dexterity, when trying to bend the cable in a small space or when the cable is already at full extension.
We have changed the outer cable cover over a short section and in doing so, achieved a less stiff and more flexible section of cable.
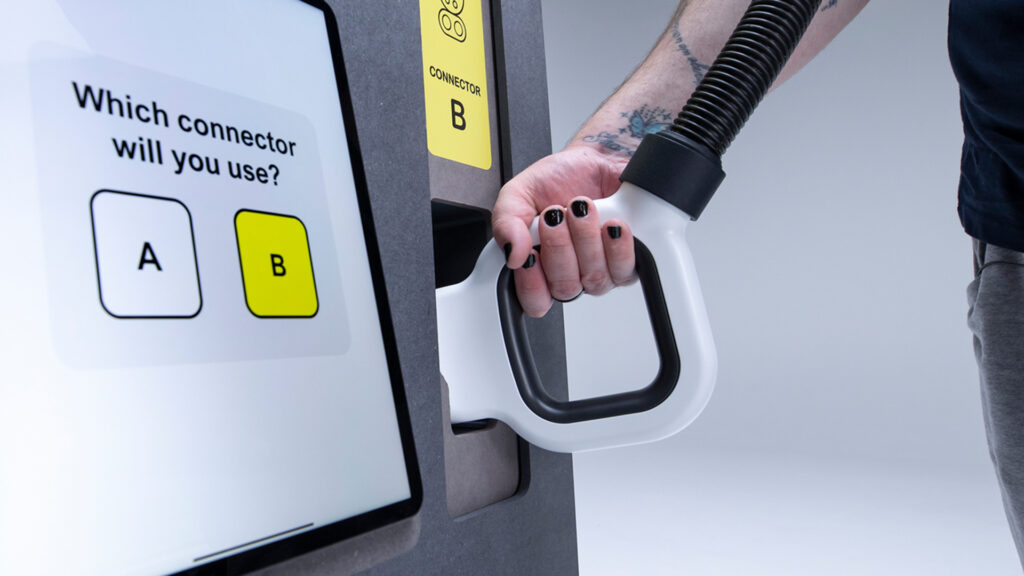
Touch screen interface design
Large, clear screen designs
Rapid charging units typically have more than one connector type to choose from, additional safety steps before charging commences and almost always the need to use a membership or payment card – resulting in a multiple step charging process.
The touch screen user interface design on our rapid charging unit provides clear instructions and relevant feedback to the user at every step of the charging process. This supports them to start, stop and pay for charging with ease.
Large, high contrast text, symbols and buttons are used to make the touch screen highly usable by a range of different people.
The images below show the different instructions and feedback visible on the touch screen display during the charging process.
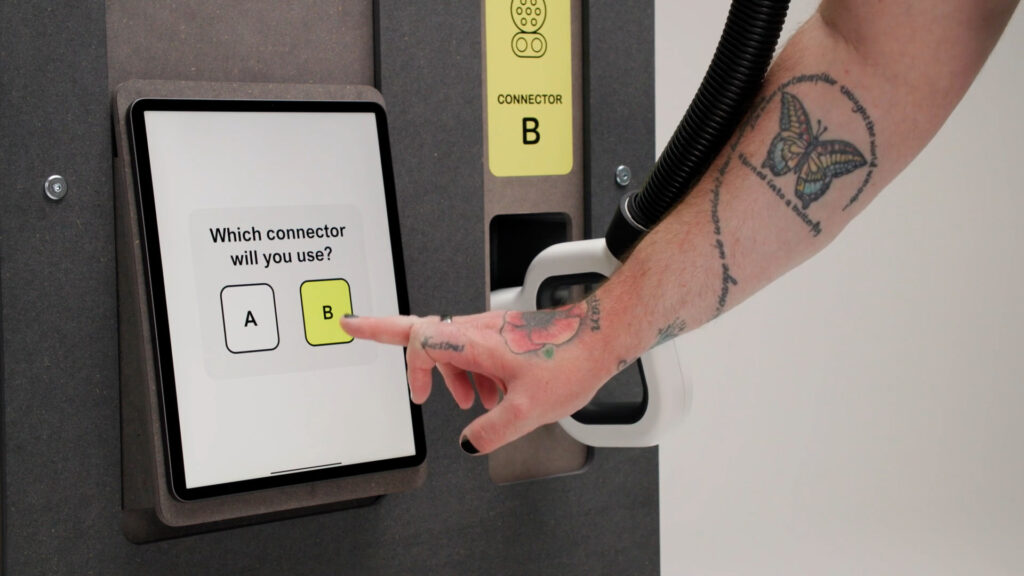


Clear labelling
We have used simple, large and high contrast label designs to help indicate key features and important information on the rapid charging unit prototype.
We used colour and symbols where necessary to distinguish between similar features. For example; the ‘yellow’ labels for Connector B with the CCS2 symbol, and white labels for Connector A (also CCS2).
A mixture of text and symbols is best practice, particularly when labelling different connectors.
Position of key features
Height of holster for connector
It is important that both seated and standing users are able to reach the connector on the charging unit to remove it from the holster and charge their vehicle.
The holster design on our rapid charging unit prototype was positioned within a height range that was accessible for both taller users and those using wheelchairs. The holster opening was also large, removing the need for precision docking, benefiting those with less strength and dexterity.
Our work with people with a range of different needs helped inform the specifications for component height in PAS 1899:2022 Electric vehicles – Accessible charging – Specification (opens in a new window).
PAS 1899:2022 provides a specific range of dimensions for minimum holster height, as well as heights for other features on the charging unit including touch screens and payment pads.


Design guidance
Take a look at our suggestions for making public EV charging more accessible
The new standard for accessible EV charging
Take a look at the requirements and recommendations set out in PAS 1899:2022 Electric vehicles – Accessible charging – Specification